Have you ever wondered how so many bullet journals are lovingly adorned with beautiful banners and why they look always crooked when you try to do draw them? This is totally me. And that is exactly why I am writing this post today: to help you hoist your banners and let them fly high all across your bullet journal. And without further ado, here is how to draw banners. Five different ones to be exact.
Why do we like banners? They help you structure a page or give emphasis to a headline. They are eye-catching and all in all so much fun to draw.
1. The Classic
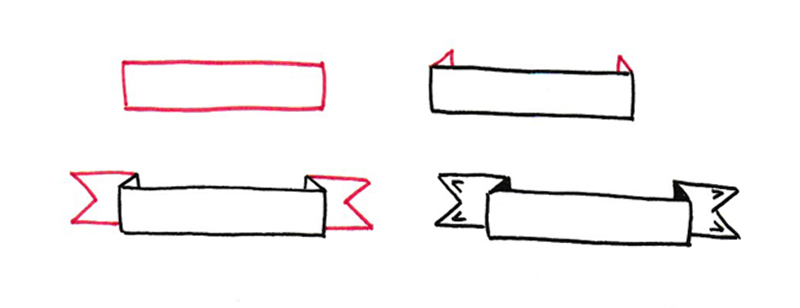
Start with a rectangular box. Then add two small triangles to the top. Now add the flaps. Make sure the flaps end higher than your box’ baseline. If you want you can now add texture to the flaps and darken the triangles (back of the flap).
2. The Classic – variation
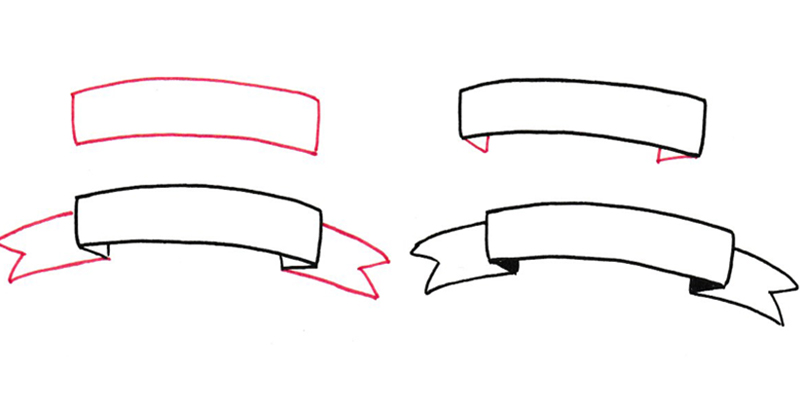
As the title suggests, this is a variation of the first banner I showed you. With this one, I chose to curve the base box ever so slightly. Follow the steps as prompted and you can’t go wrong.
3. The Wrap
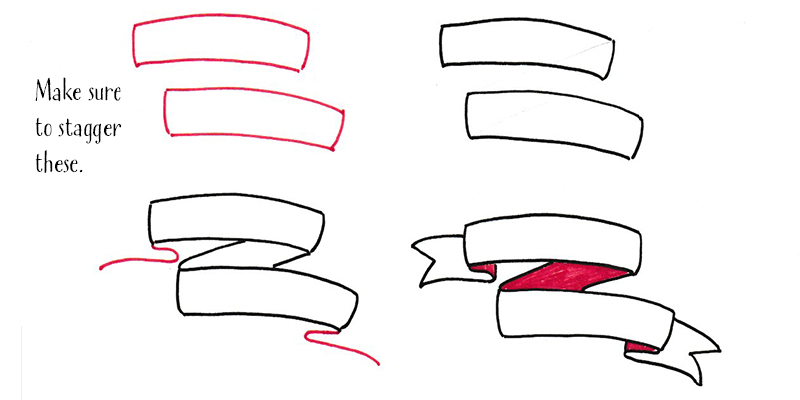
This one is a little bit more advanced, but you can do it. I had to fiddle around with it at first, but it did turn out nicely. Make sure to stagger your first two boxes. Then, connect them in a Z like way from the end of the top to the beginning of the first. The flaps are similar like the ones above but achieved differently. The bottom lines almost look like a swoosh.
4. The Single Fold
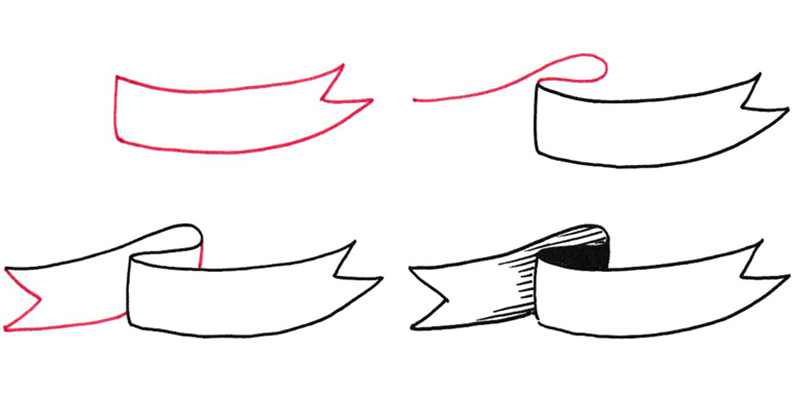
Start the single fold with a slight bend to your base box. You can let this end in a forked flap if you wish. Next, add your upper swoosh (would also work on the bottom). Finish your
5. The Scroll
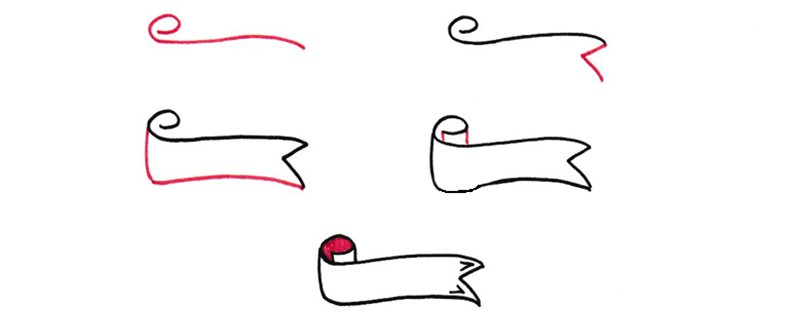
Start your top line almost like a lower-case letter e with a very long tail. Then add your vertical V-shape to create the side of the flap and close up your base box. Make sure the lower curve of the box matches as closely as you can to your upper curve. Add two vertical lines to finish off the scroll look and et voila, you did it.
A few more tips: Test your headline size and length before you set your banner in stone, so to speak. Penciling in the headline and box size helps a great deal. You can also create your favourite banners on one sheet, and draw them in a nice “fat” black. Keep this sheet handy and you can use this to trace your next banner into your journal or similar medium. Never forget, have lots of fun and keep practicing how to draw banners. It’ll become second nature in no time.
Have fun practicing how to draw banners.