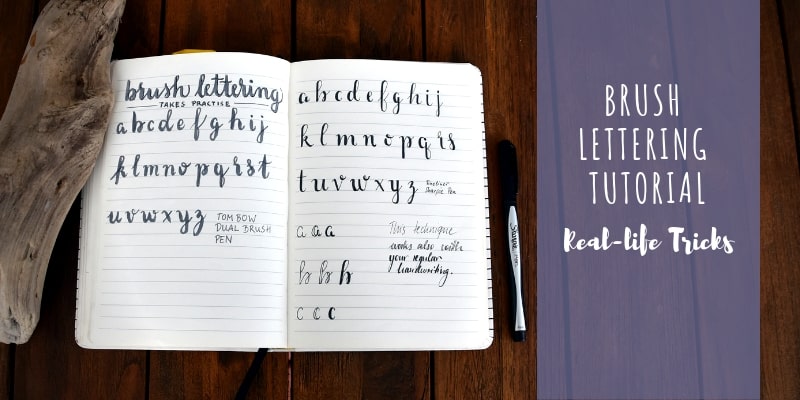
It has come to this. You have started your bullet journal or been looking at other people’s successes with their journals and couldn’t help yourself but feeling utterly envious of the simple ease with which presumably all the bullet journalers skillfully master their fonts and headlines. I hear you, I have been there, and I have searched many times for “brush lettering tutorial”.
I’ll be super honest with you, what you see online is so often the most perfected version of itself, in this case, brush lettering or faux calligraphy. Don’t get me wrong, I utterly admire all those wonderfully skilled artists out there that have mastered the skill of calligraphy and the art of brush lettering. I know from my own experience, it takes a lot of practice, patience, diligence, not giving up and bit more practice. Yes, and let’s add a bit more practice, please. After all, practice makes perfect. I have yet to come across a single brush lettering tutorial that shows the struggles the artists face.
And of the topic of being honest, I did study graphic design, a long time ago and for that, I had to take courses in calligraphy. Even so, brush lettering IS hard. Creating elegant swirls and holding the pen do come easily to me, yet my lettering is often not as perfect as I would like it to be. Nevertheless, I do not mean to discourage you. On the contrary. I am writing this post about brush lettering for you, to tell you to just dive in, hang in there and/or not give up. You will get there, all it takes is practice and accepting the stage you are in.
Brush lettering tutorial: Real-life trick #1: Tools
To get started, you won’t need to rush to by fancy paper or pens. Don’t get me wrong, I love fancy stationery, but there are less expensive options out there for sure. 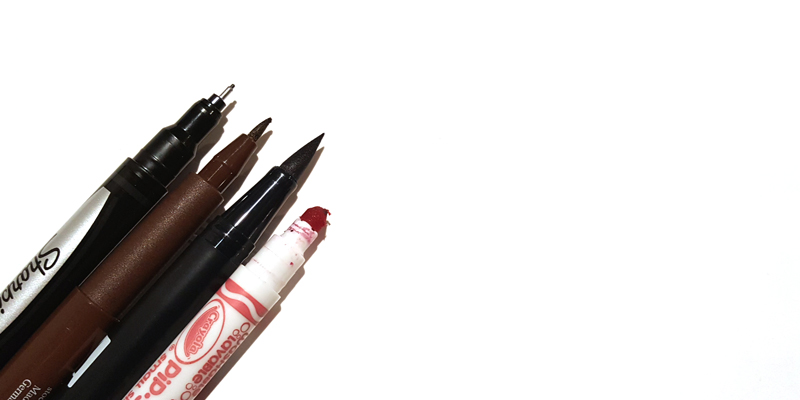 What you will need:
- Brush pen or Crayola pip squeak pen, brush and watercolor
- Paper
- Patience
Yes, a brush pen is probably best, but before spending money on a pen you probably run dry just by practicing your letters, you could practice the technique of holding it and varying pressure just as easily with a Crayola pip squeak pen. I borrow my daughter’s pens sometimes. Oops, another real-life trick comes out.Brush lettering tutorial:
Brush lettering tutorial: Real-life trick #2: Paper
The smoother the paper, the better for the pen. But again, don’t worry about buying fancy paper if you are just practicing with a practice pen. The exercise is just as effective. Tracing paper also helps, if you have that handy. Using lined paper also helps at first to get the hang of writing straight.
Brush lettering tutorial: Real-life trick #3: Technique
What do brush letters consist of? In short, thinner upstrokes, and thicker down strokes and some transitions in between. Let’s try. 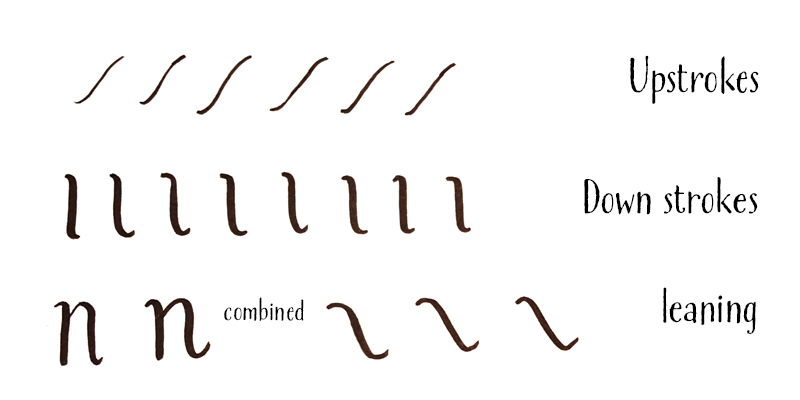
Practice simple up and down strokes and fill a full page. Get a good feel for the pen and how much pressure it takes to create thinner versus thicker lines. Go and practice now. Once you feel confident, try to put up strokes and down strokes together in a waveform. Practice and fill another page.
Brush lettering tutorial: Real-life trick #4: Practice
I know you can’t wait to progress and get to use this font in your bullet journal. But again, think of the four P’s: grab your pen and paper and patience, and practice. Ok, I’ll give you two letters to practice the combined up and down strokes: n and u. 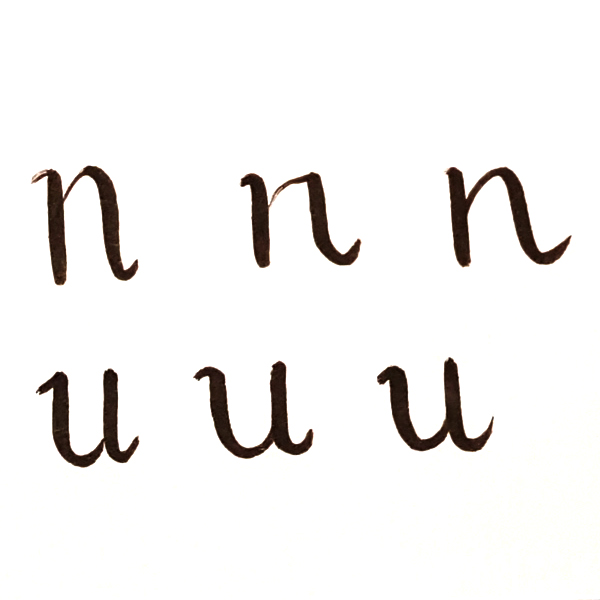
Done? Great, let’s move on. Let’s progress to the next level: curves. 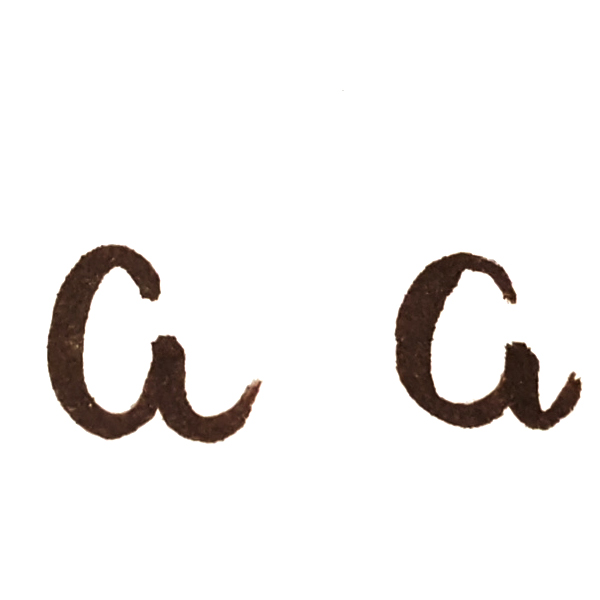
The trick with curves is to not rush it and control the amount of pressure to the pen and angle you hold it in. Practice some a’s, e’s, c’s Now you can add strokes to curves like in the letter d, g or q. 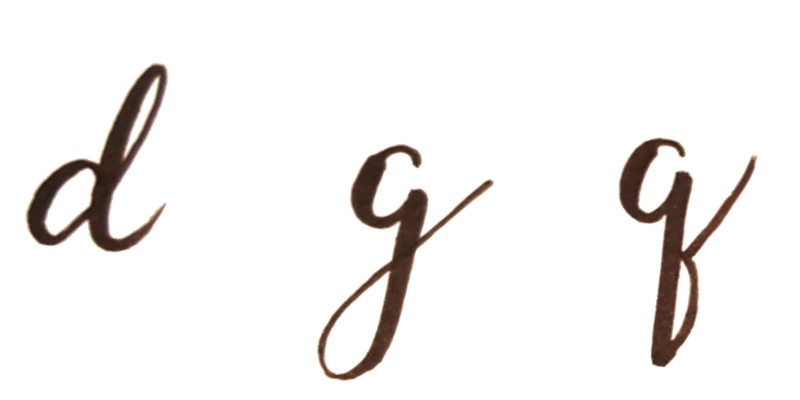
Again, take your time, pick up the pen from the paper very briefly, if needed, and keep going.
Brush lettering tutorial: Real-life trick #5: Make things easier
Have a look at your favourite brush lettering style and get familiar with the shape of each letter. Practice the flow of the letters with a regular fine tip pen to get the shape into your muscle memory. When this feels familiar switch to the brush pen. Fill pages and pages with your letters.
Brush lettering tutorial: Real-life trick #6: Cheat
Use a pencil to sketch out the word on your page. Either use a brush pen right away or add a second line next to your down-strokes to mimic the thin-thick effect and then fill the gap between the two down strokes and voila, you have created faux calligraphy. Yay. By using a pencil you see how much space the word takes up on your space and where you want your swirls to land.
Brush lettering tutorial: Real-life trick #7: Practice makes perfect
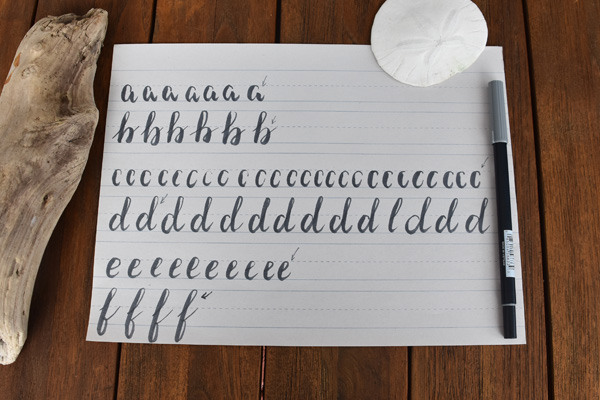
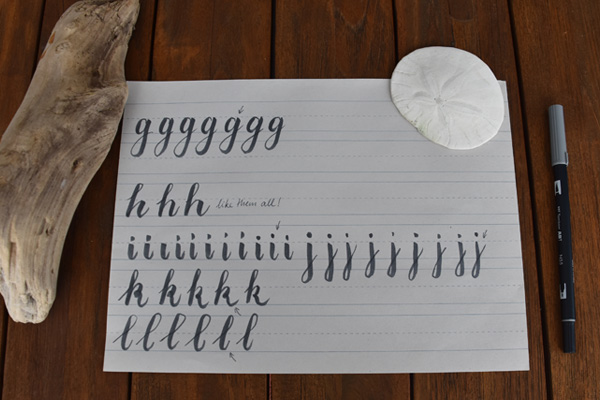
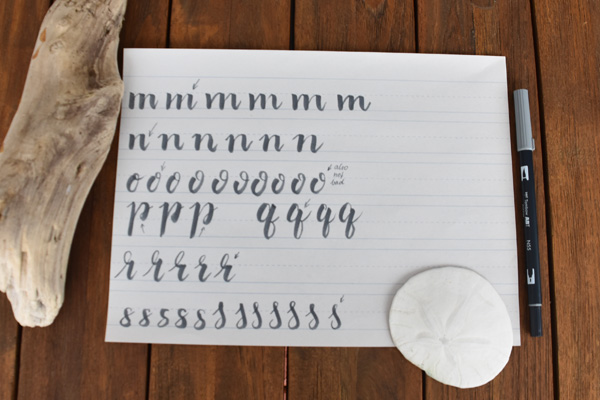
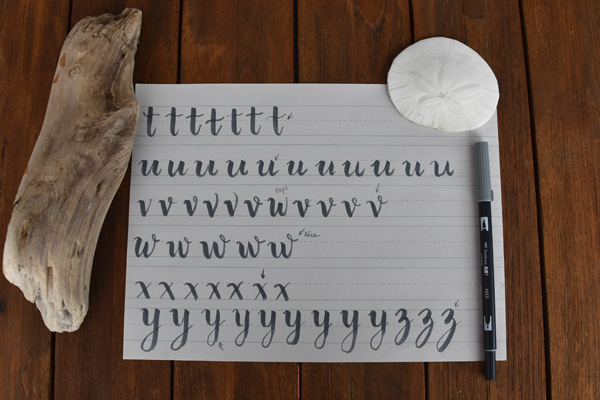
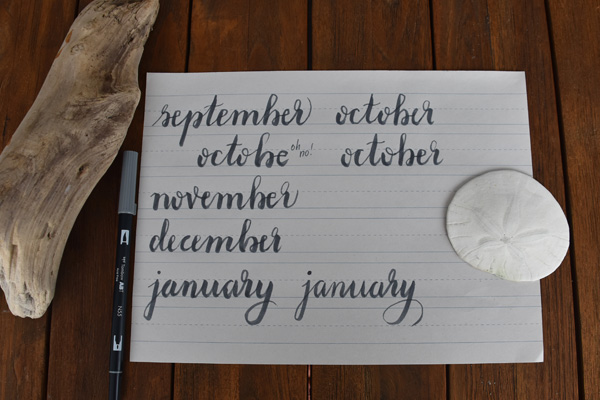
Do you see how many of these letters look uneven or have too little variation in the thickness of the stroke? It is because this takes a lot of practice. I can’t stress this enough. Practice makes perfect.
Brush lettering tutorial: Real-life trick #8: Large font
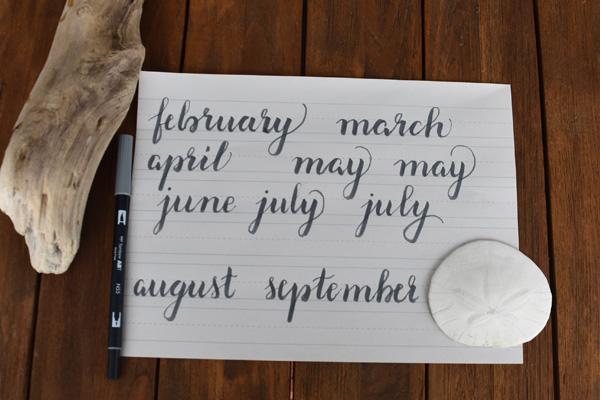
Another trick is to try a larger font first. The change between thick and thin strokes is way easier to master in a larger font. When you feel confident in lettering larger words, try your hand at smaller fonts.
Whenever you feel like it, start transferring your new skills to your bullet journal. Don’t be afraid of making mistakes. It is all part of the process. Thanks for reading. What do you struggle most with when it comes to hand lettering? Let me know, I would love to know how I can help you.